User Manual: Creating eStamp Orders in Preproduction Environment
eStamp Order Creation Preproduction
This comprehensive guide will walk you through the process of creating dummy eStamp orders within the pre-production environment using the Contract360 dashboard.
Step 1: Login & Navigation
- Log in to the dashboard for the pre-production environment.
- Navigate to the "Estamp Order Management" section from the sidebar or top menu.

Step 2: Create Stamp Order
- Click the "Create Stamp Order" button.
- A modal will appear with options to create an order.
Step 3: Fill in Order Details
1. Select the "eStamp" tab.

2. Fill out the following fields:
- First Party Name: Example: Signzy Technologies Private Limited Rules:
- Must be ≤ 50 characters (including spaces
- No special characters allowed

- State Code: Select the state for which the dummy stamps are to be added.

State | State Code |
|---|---|
Karnataka | KA |
Maharastra | MH |
Gujarat | GJ |
Andhra Pradesh | AP |
Andaman and Nicobar Islands | AN |
Assam | AS |
Bihar | BR |
Chhattisgarh | CT |
Chandigarh | CH |
Dadra and Nagar Haveli | DN |
Daman and Diu | DD |
Delhi | DL |
Himachal Pradesh | HP |
Jammu and Kashmir | JK |
Jharkhand | JH |
Ladakh | LA |
Orissa | OR |
Pondicherry | PY |
Rajasthan | RJ |
Tamil Nadu | TN |
Tripura | TR |
Uttar Pradesh | UP |
Uttarakhand | UT |
Punjab | PB |
West Bengal | WB |
Goa | GA |
Haryana | HR |
Kerala | KL |
Manipur | MN |
Meghalaya | ML |
Mizoram | MZ |
Nagaland | NL |
Lakshadweep | LD |
Sikkim | SK |
Arunachal Pradesh | AR |
Telangana | TG |
Madhya Pradesh | MP |
- Article Code: Choose the appropriate article code under which the stamps should be added.

- Denomination: Enter the denomination (e.g., 100, 500) for the dummy stamps.

- Quantity: Enter the number of dummy stamps required.

- Email : Please enter the email address(s) where you would like to receive the eStamp order confirmation mail. You may enter multiple addresses, separated by commas.
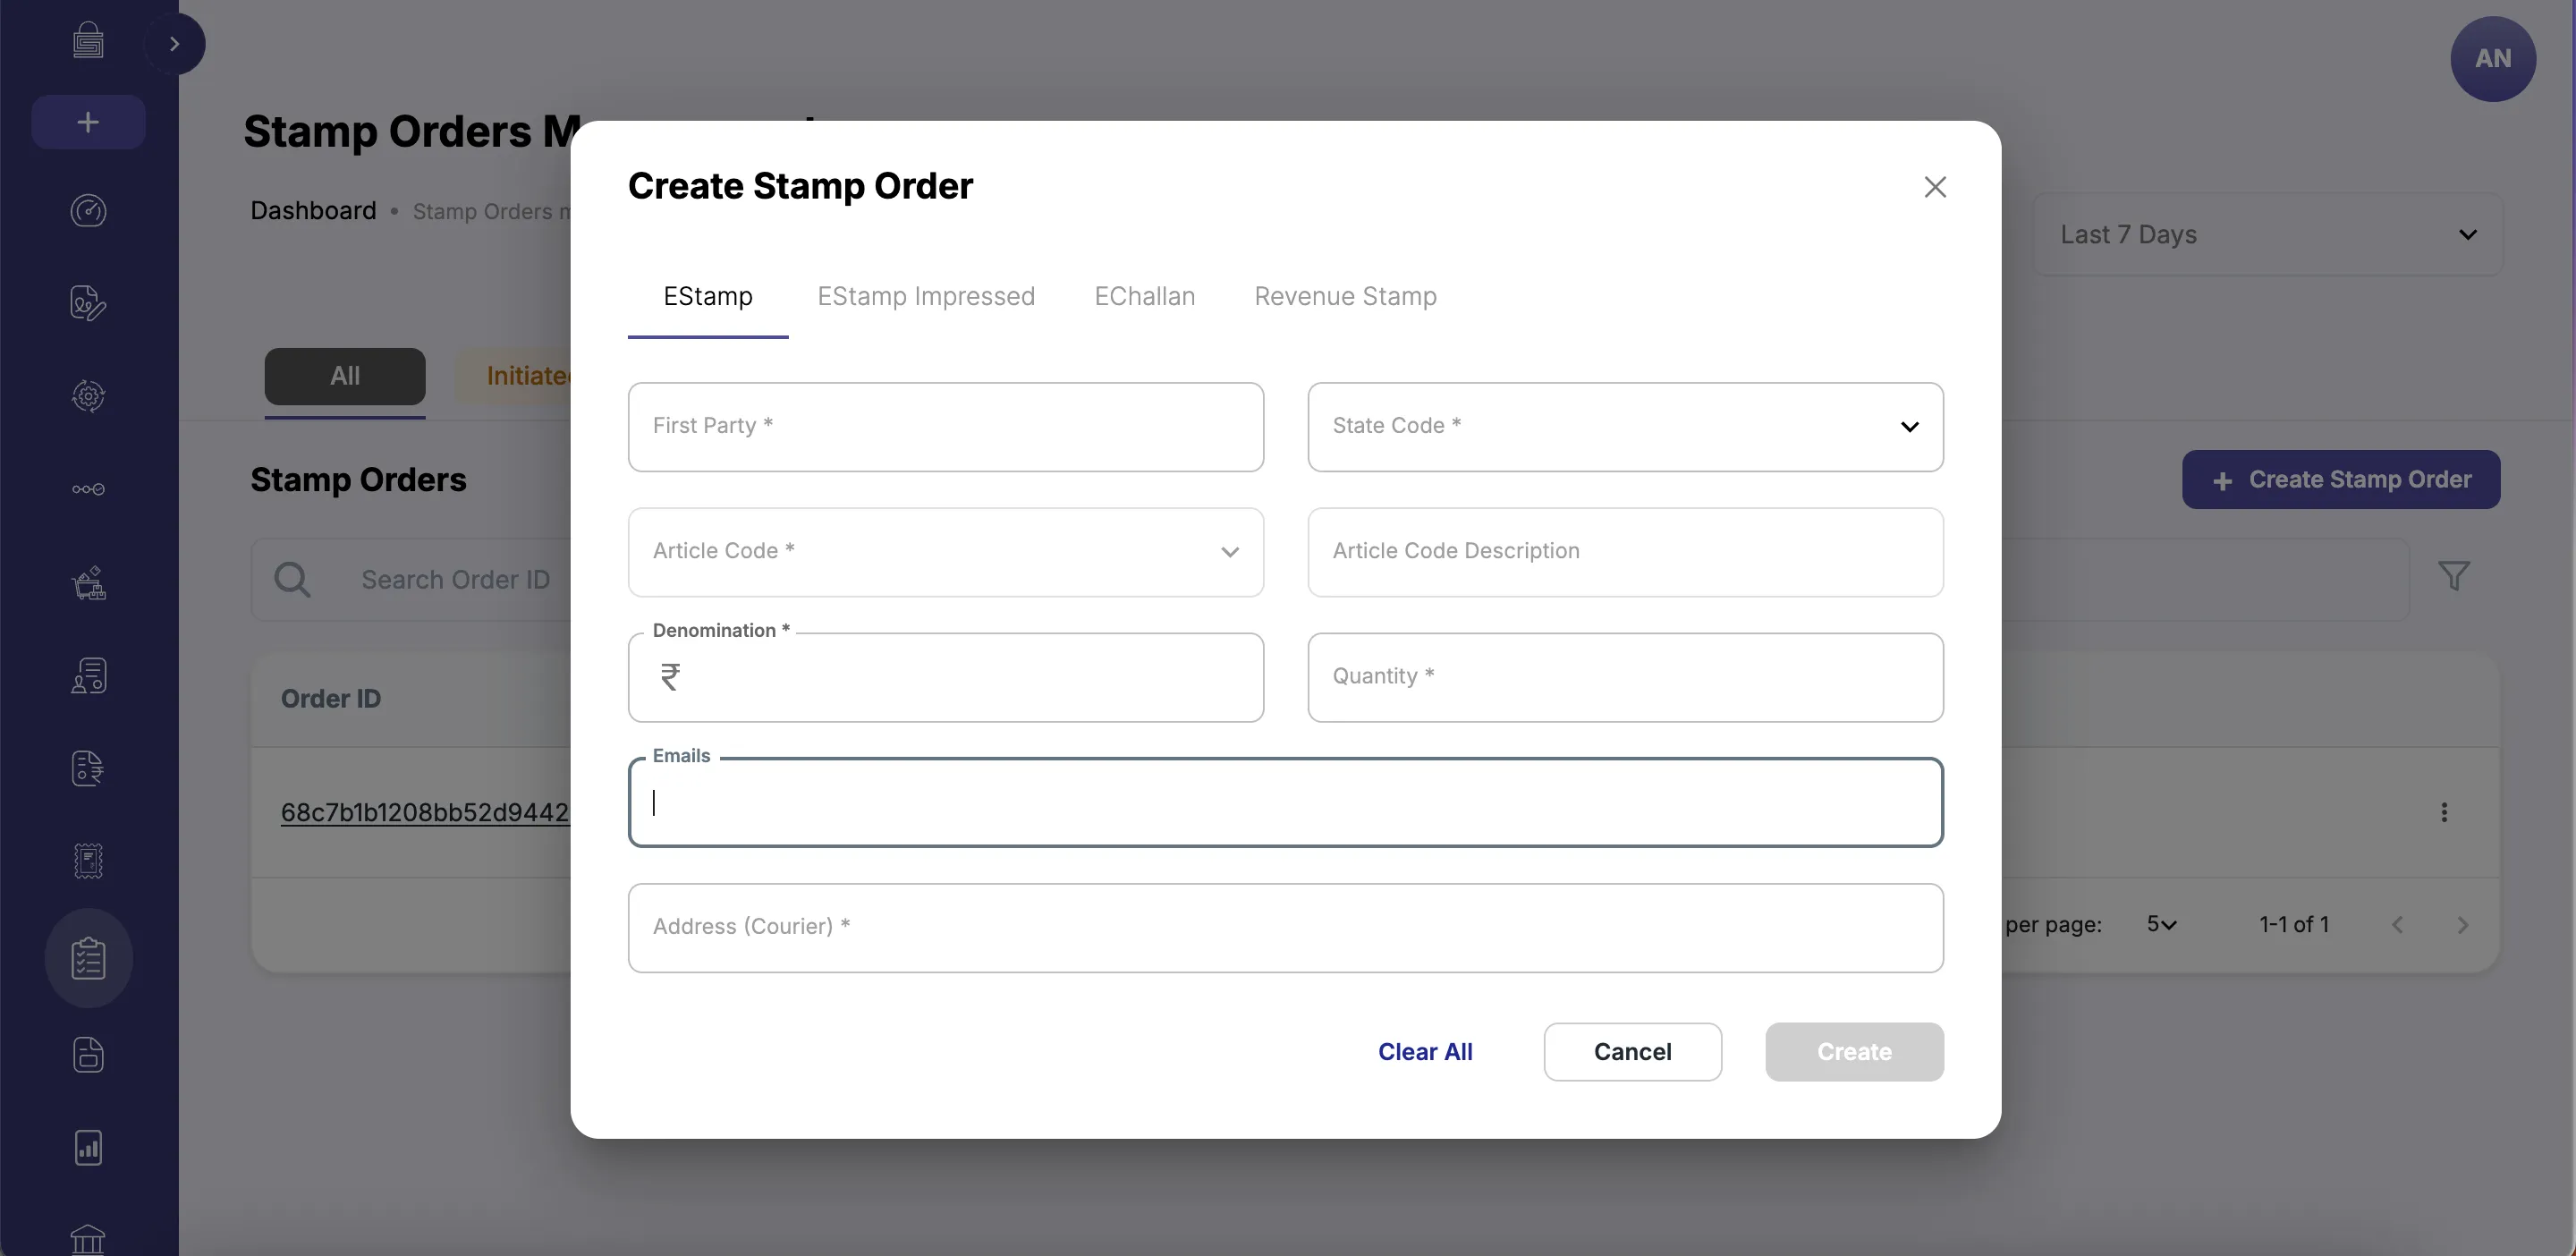
- Courier Address: Although this field is mandatory, since these are dummy stamps, you may enter NA.

- Click on the create button a confirmation message will appear, and the order status will change to Initiated

Once the order is created, a confirmation email will be sent to all the addresses provided in the email field.
Step 4: Notify the Procurement Team
Once the order is created, please inform the procurement team at [email protected] along with the order IDs, so the order can be fulfilled
Order Lifecycle & Post-Order Creation
1. Order Actions:
- As a client, you may cancel the order at any point before the ops user accepts the order.

Note: An order can only be cancelled before it is accepted by the Ops user. Once the Ops user accepts the order, Cancellation is no longer allowed
2. Ops Review:
- An Ops user will perform a feasibility check on the order:
- If the order fails, it will be rejected, and the order state will be moved from Initiated to Rejected. The Ops user will send an email with the reason for rejection.

- If the order passes, the Ops user will accept the order and upload the dummy stamps

3. Order Fulfillment:
- Once uploaded, the order will be marked as fulfilled.

- The dummy stamps will be available in your wallet under the eStamp Management section.

Important Notes
- Dummy stamps are not real and are only used for testing purposes.
- Ensure all fields are correctly filled as per the guidelines to avoid rejection.