---
title: Windows Web: Prod and Pre-Prod
slug: contract360/eJUA-windows-web-prod-and-pre-prod
createdAt: 2024-08-07T18:21:23.901Z
---
# Introduction
This document aims to provide comprehensive guidance for performing the **Fingerprint signing **with the help of the **Mantra MFS110 L1 **device in the **Windows web browser **with **eMudhra **as the Esigning Service Provider (ESP) in both the **Production **and **Pre-Production **environment.
## Contract Signing In Production Environment:
### Prerequisites Required:
Below are the prerequisites required to perform the Aadhaar-based fingerprint signing in the production environment with the help of the Mantra MFS110 L1 device.
1\. **MFS110 Driver**
2\. **MFS110 Windows RD Service**
3\. Mantra Biometric Device L1 **(MFS110 L1)**.
Below are the steps required to set up the above-mentioned drivers to perform the signing.
### Steps to Follow:
**Step 1: Visit **the Mantra official website to install the drivers [https://www.mantratec.com/Download/User](https://www.mantratec.com/Download/User). Select the product category “Authentication Device- Aadhar” and select the “MFS110 L1”.

**Step 2: **Click on the driver and download the “**MFS110 Driver**”. **Double-click** on the downloaded file. The installation process will start.

**Step 3: **Click the “**Install**” and the installation process will start. Once the installation is completed click on the “**Finish**” Button to complete the installation.

**Step 4: **Click on the “**RD Service**” and download the “**MFS110 Windows RD Service**”.

**Step 5: Double-click** on the downloaded file to start the installation process. Click on “**Next**”. Click on “**Install**” to install the device.

**Step 6: **“Click on the “**Finish**” button to complete the installation of the MFS110 RD Service.

**Step 7: **Insert the biometric device. The confirmation will appear at the bottom right side of the screen stating “**Device Attached**”.

**Step 8: **After the above confirmation message a “**Framework is ready to use**” message will appear leading to the device ready to perform the signing.

**Step 9: **Navigate to the **signing link** sent to the signer’s email (provided while initiating the contract).
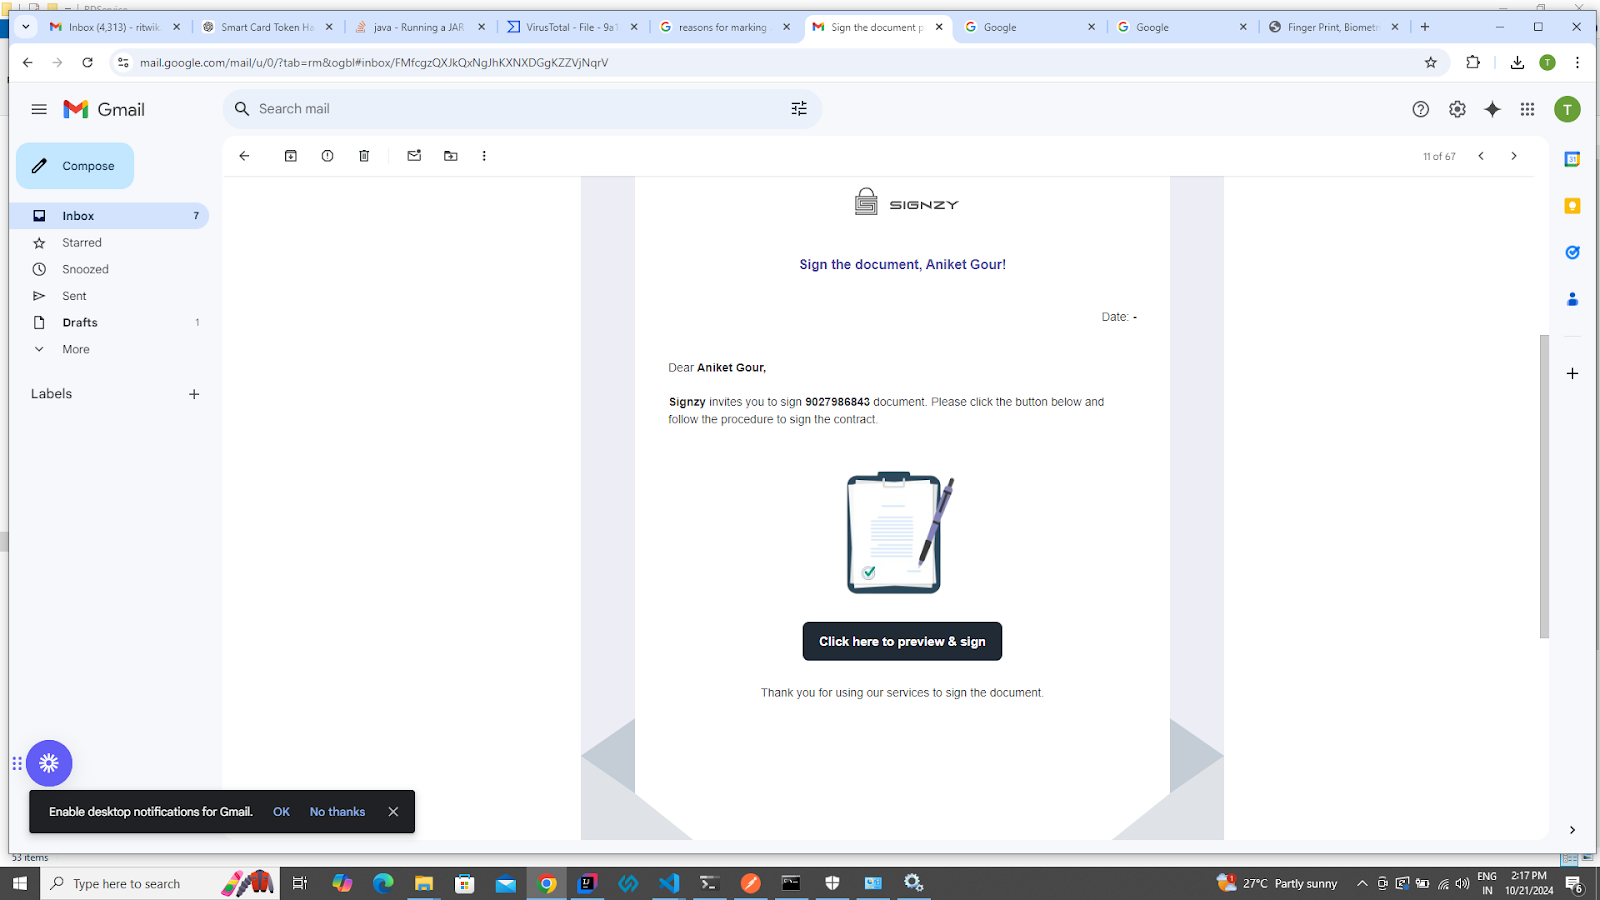
**Step 10: **The pre-verification page will open, where the user needs to perform verification using a one-time OTP. Click on the “**Get OTP**” button.

**Step 11: **The user will receive the OTP on the **email** provided during contract initiation.
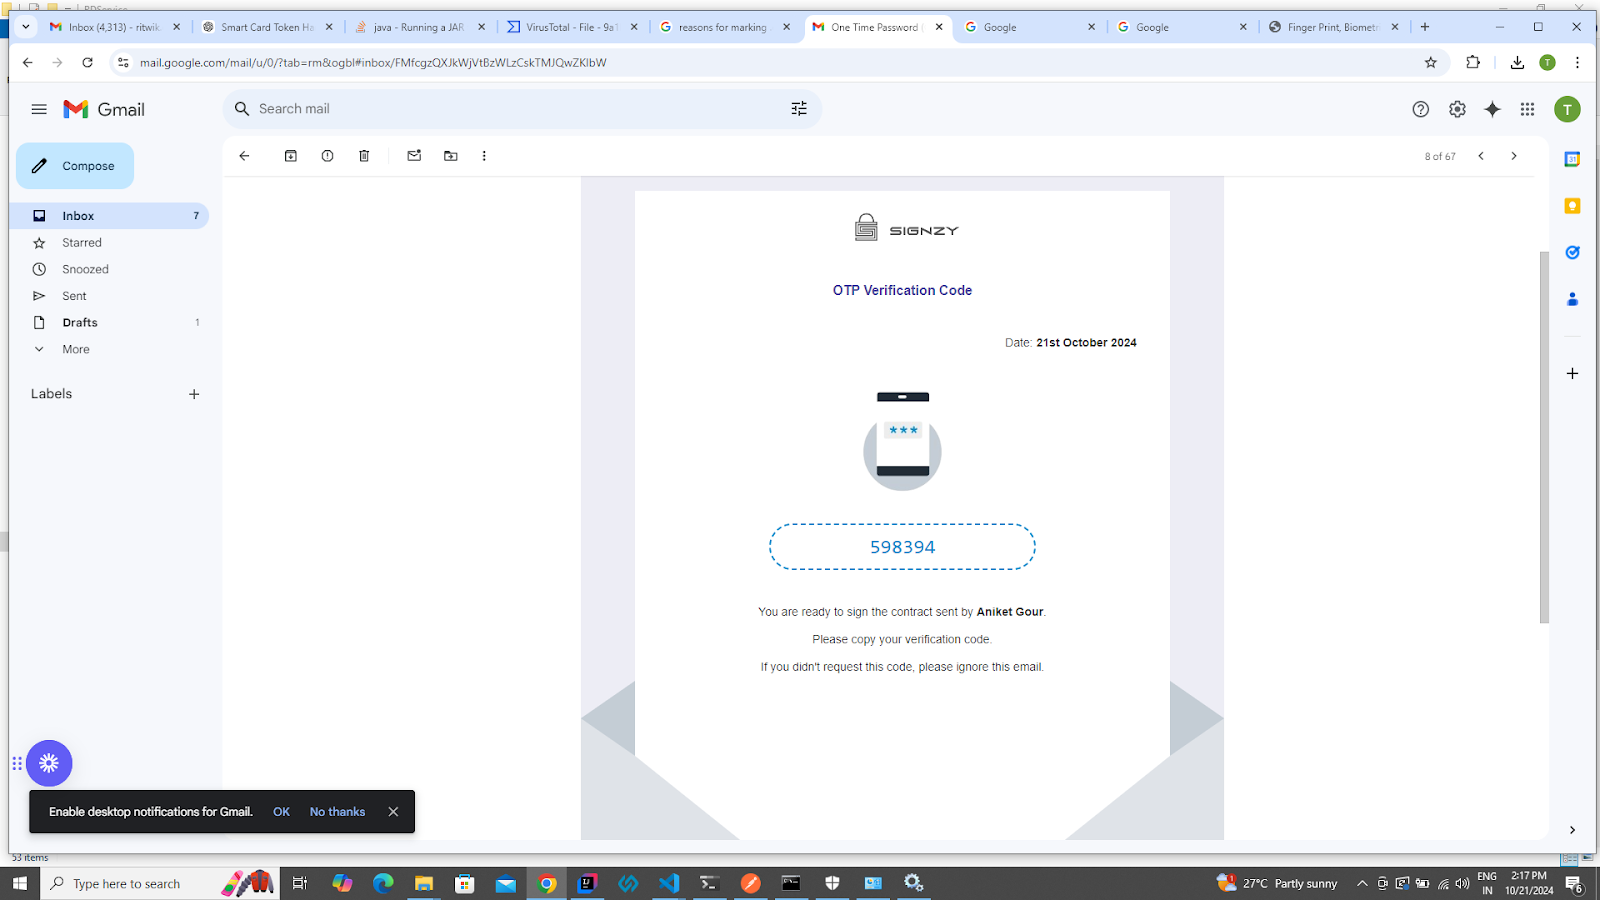
**Step 12: **Enter the OTP received via email and click on the “**Verify**” button.

**Step 13: **Upon successful verification, the user will land on the contract page. Click on the “**I want to sign**” button to proceed.

**Step 14: **The eMudhra Interface will open, Fill in the **Aadhaar Number**. Click on “**Select Device**” and from the list of devices select the **Mantra Fingerprint MFS110**.

**Step 15: Tick** the consent box. Double Click on the “**Capture Fingerprint**” button to perform the signing.

**Step 16: **A notification will appear on the bottom left side of the screen stating “**Put Your Finger**”.

**Step 17: **Place your finger firmly on the device. The finger will be automatically captured and a notification will appear on the bottom left side of the screen stating “**Capture Success**”.

**Step 18: **The user will be automatically redirected to the signed contract where they can see their signature affixed to it. Click on “**Done**” to complete the signing process.

**Step 19: **The user will see the Success page and can click on the “**Great**” button or be redirected to the success URL set by the contract initiator after 5 seconds.

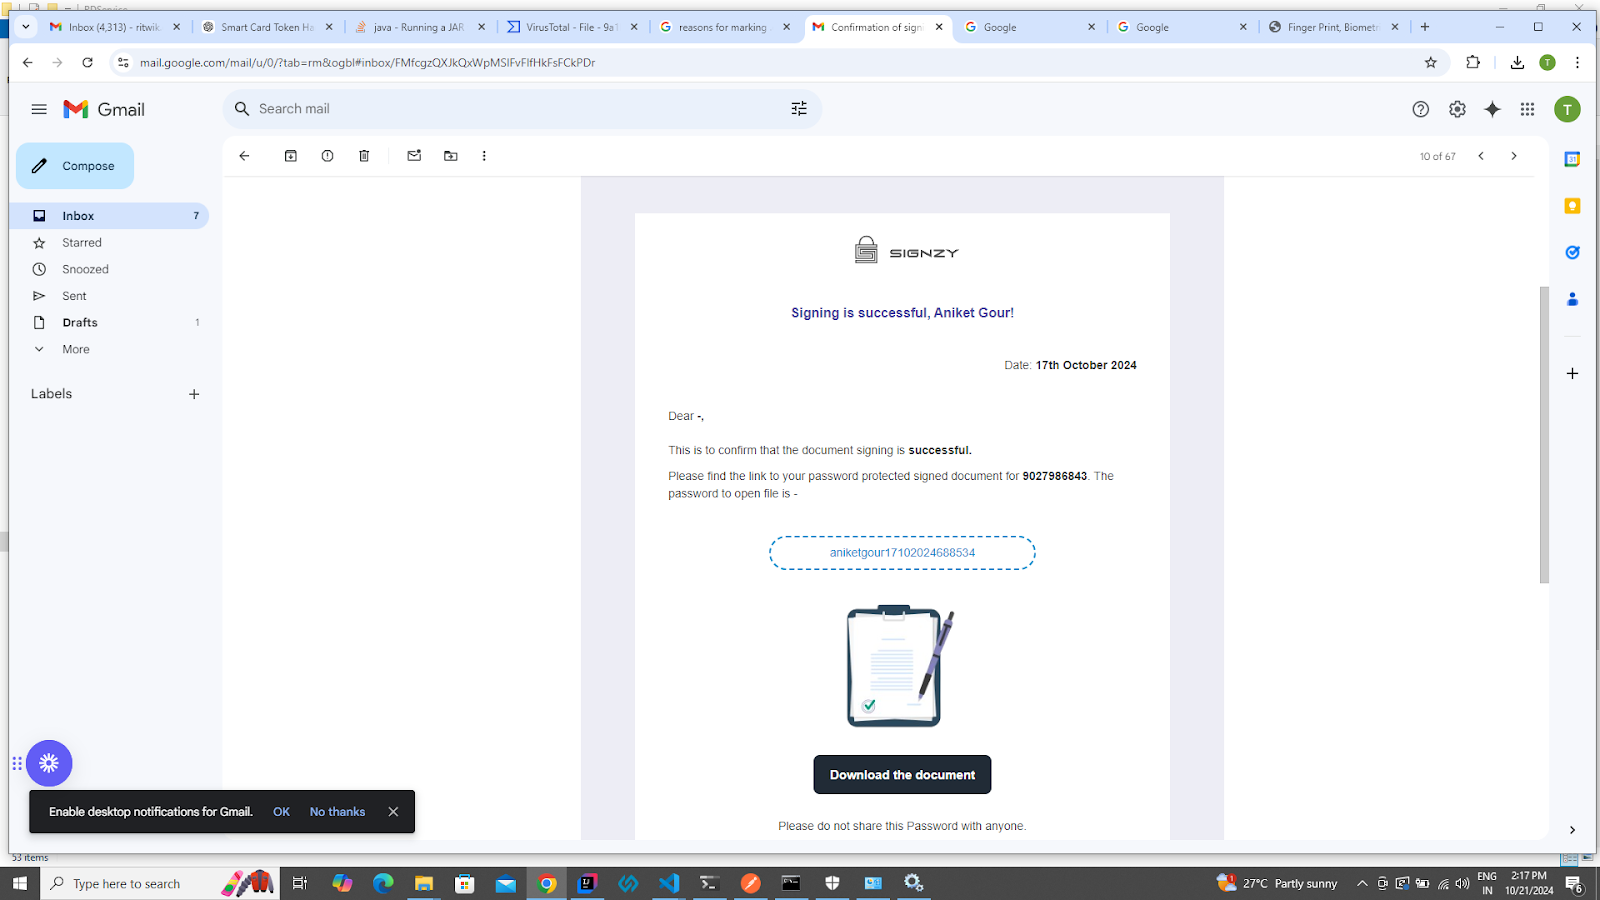
**Step 20: **The user will receive a confirmation email with the header “**Confirmation of signing the document**,” containing the signed contract.
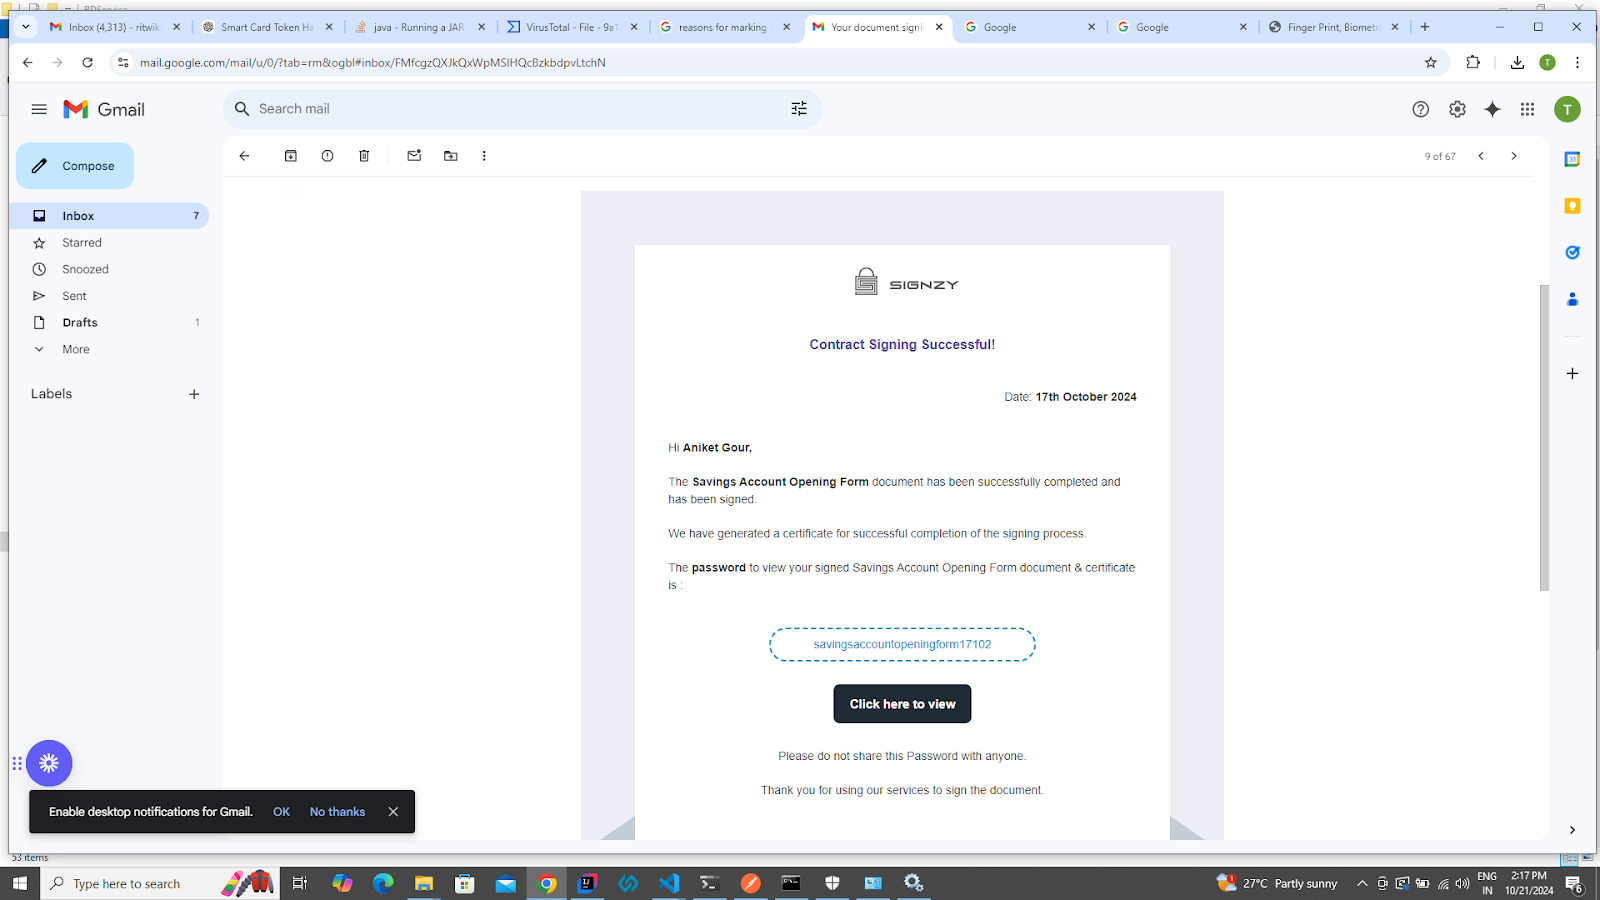
**Step 21: **Once all signers have signed the contract, the user will receive another email with the header “Your document signing has been finalized successfully,” containing the **final signed contract **and the **Audit Trail Certificate**.
## Contract Signing In Pre-Production Environment:
The Mantra MFS110 L1 Device is registered for the production environment by default to register the device for the pre-production environment please drop an email to the [servico@mantratec.com](mailto\:servico@mantratec.com) along with the device serial number requesting to register the device for the pre-production environment.
## Prerequisites Required:
Below are the prerequisites required to perform the Aadhaar-based fingerprint signing in the production environment with the help of the Mantra MFS110 L1 device.
1\. **MFS110 Driver**
2\. **MFS110 Windows RD Service**
3\. Mantra Biometric Device L1 **(MFS110 L1)**.
Below are the steps required to set up the above-mentioned drivers to perform the signing in a prep-production environment.
### Video Tutorial:
To make the setup process for fingerprint signing easier, we have included a video tutorial in the documentation. This video offers a step-by-step guide on how to configure the fingerprint device to perform secure signings.
[https://drive.google.com/file/d/1YKkYu\_Uwxt0GmUE9L97v6eAXptCaQUry/view?usp=sharing](https://drive.google.com/file/d/1YKkYu_Uwxt0GmUE9L97v6eAXptCaQUry/view?usp=sharing)
### Steps to Follow:
**Step 1: Visit **the Mantra official website to install the drivers [https://www.mantratec.com/Download/User](https://www.mantratec.com/Download/User). Select the product category “Authentication Device- Aadhar” and select the “MFS110 L1”.

**Step 2: **Click on the driver and download the “**MFS110 Driver**”. Double-click on the downloaded file. The installation process will start.

**Step 3: **Click the “I**nstall**” and the installation process will start. Once the installation is completed click on the “**Finish**” Button to complete the installation.

**Step 4: **Click on the “**RD Service**” and download the “MFS110 Windows RD Service”.

**Step 5: Double-click** on the downloaded file to start the installation process. Click on “Next”. Click on “Install” to install the device.

**Step 6: **Click on the “**Finish**” button to complete the installation of the MFS110 RD Service.

**Step 7: Insert **the biometric device. The confirmation will appear at the bottom right side of the screen stating “**Device Attached**”.

**Step 8: **After the above confirmation message a “**Framework is ready to use**” message will appear leading to the device ready to perform the signing.

**Step 9: **Go to the “**Local Disk (C)**" Open **Program Files**. Look for the **Mantra folder** and open the **RD Service folde**r. Click on the** MFS110**. Find Config.xml file.
Path (C:\Program Files\Mantra\RDService\MFS110).

**Step 10: **Open the **Config.xml **file with Notepad.

**Step 11: **By default, the RD Service is set for production which is shown \.

**Step 12: **In the \ will be set.

**Step 17: **Search for the “**Service**” from the Windows settings and click on it.

**Step 18: **The Service Interface will open. Look for the “**Mantra MFS110 AVDM**”. Click on it. Besides a taskbar will appear. Click on the “**Restart**” service button.

**Step 19: **The Mantra RD Service will restart. Please wait for a second to complete the process.

**Step 20: **Plug the Mantra MFS110 L1 device into the Windows system. A confirmation message will appear stating “**Device Attached**” at the bottom right of the screen.

**Step 21: **After the confirmation, another message will pop up at the bottom right corner of the screen stating “**You have successfully converted the device into an Aadhaar L1 registered device**”.

**Step 22: **Please unplug the device and replug it. A confirmation message will appear stating that the **device is attached** along with a confirmation message “**Framework is ready to use**”.

**Step 23: Open** [https://rdtest.aadhaardevice.com/](https://rdtest.aadhaardevice.com/) and click on “Discover AVDM”.

**Step 24: **A confirmation message will appear stating “RDSERVICE Discover Successfully”. Click the “**OK**” button.

**Step 25: **Navigate to the **signing link** sent to the signer’s email (provided while initiating the contract).
**Step 26: **The pre-verification page will open, where the user needs to perform verification using a one-time OTP. Click on the “**Get OTP**” button.

**Step 27: **The user will receive the OTP on the** email** provided during contract initiation.

**Step 28: **Enter the OTP received via email and click on the “**Verify**” button.

**Step 29: **Upon successful verification, the user will land on the contract page. Click on the “**I want to sign**” button to proceed.

**Step 30: **The eMudhra Interface will open, Fill in the **Aadhaar Number**. Click on “**Select Device**” and from the list of devices select the **Mantra Fingerprint MFS110**.

**Step 31: Tick** the consent box. Double-click on the “**Capture Fingerprint**” button to perform the signing.

**Step 32: **A notification will appear on the bottom left side of the screen stating “**Put Your Finger**”.

**Step 33: **Place your finger firmly on the device. The finger will be automatically captured and a notification will appear on the bottom left side of the screen stating “**Capture Success**”.

**Step 34: **The user will be automatically redirected to the signed contract where they can see their signature affixed to it. Click on “**Done**” to complete the signing process.

**Step 35: **The user will see the Success page and can click on the “**Great**” button or be redirected to the success URL set by the contract initiator after 5 seconds.

**Step 36: **The user will receive a confirmation email with the header “**Confirmation of signing the document**,” containing the signed contract.

**Step 37: **Once all signers have signed the contract, the user will receive another email with the header “Your document signing has been finalized successfully,” containing the **final signed contract **and the **Audit Trail Certificate**.
